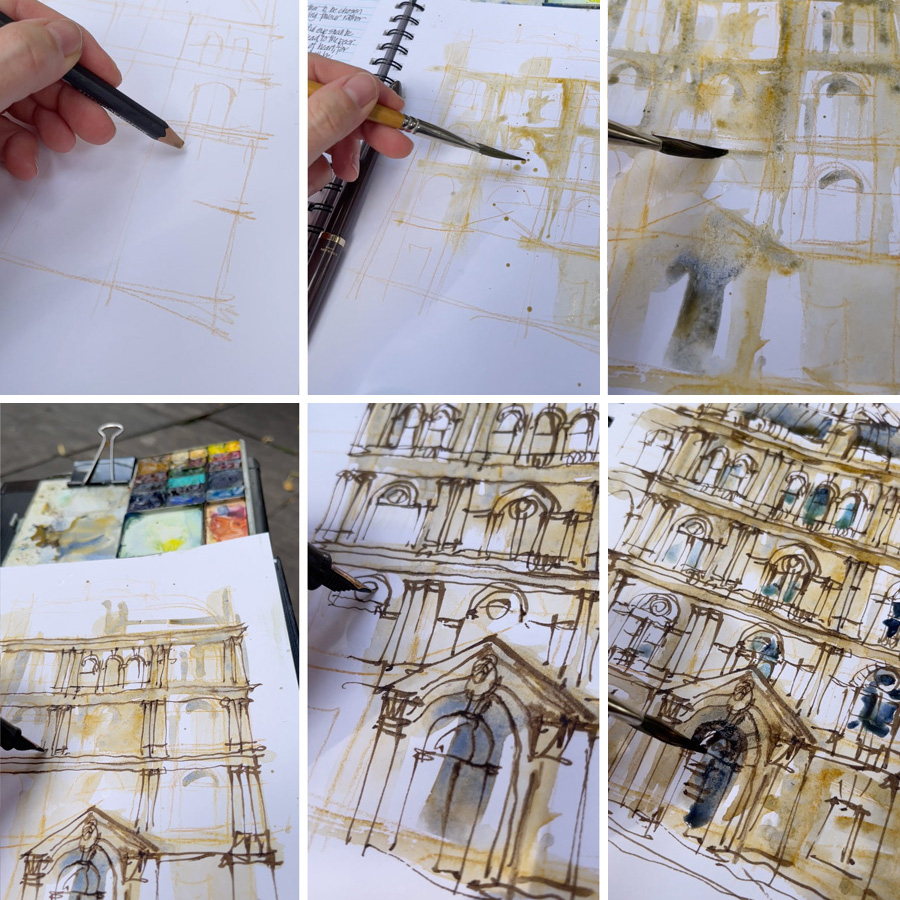
Last week I shared a sketch of the Lands Department Building by JimmyB and today I’m sharing all my steps. I’ve also published a short video as an Instagram Reel here that shows some highlights of the sketch.
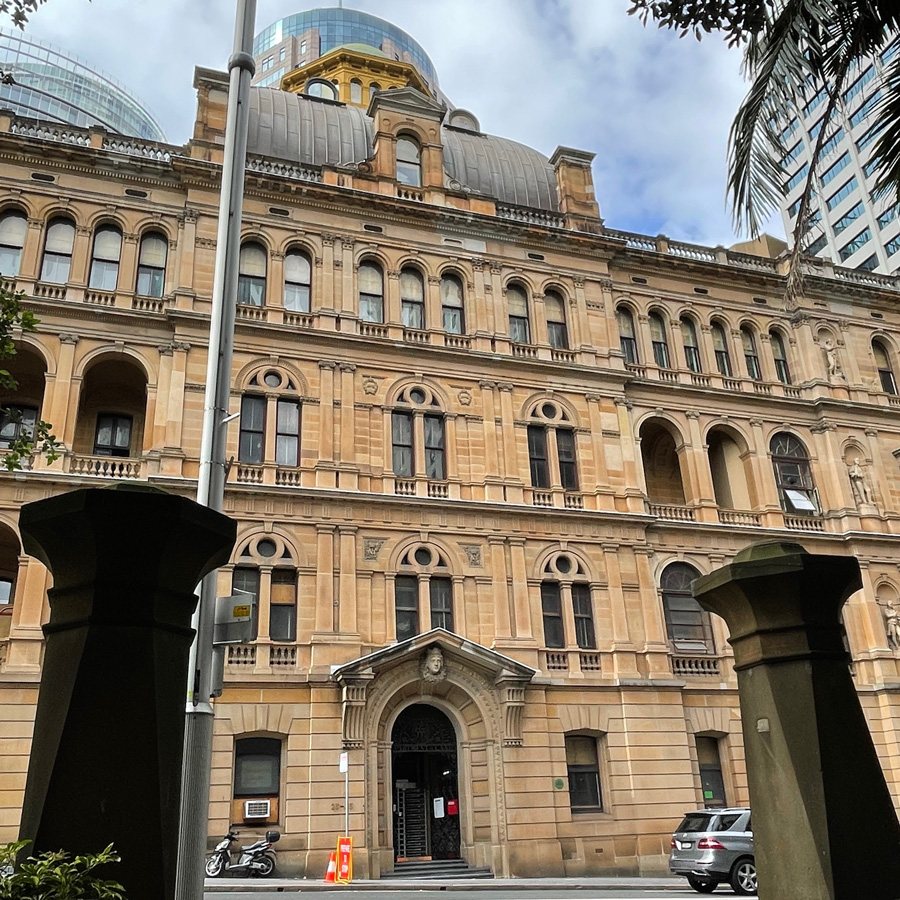
Here is a photo showing the part of the building that I was sketching. I spent a few moments looking at the building before I got my sketchbook out.
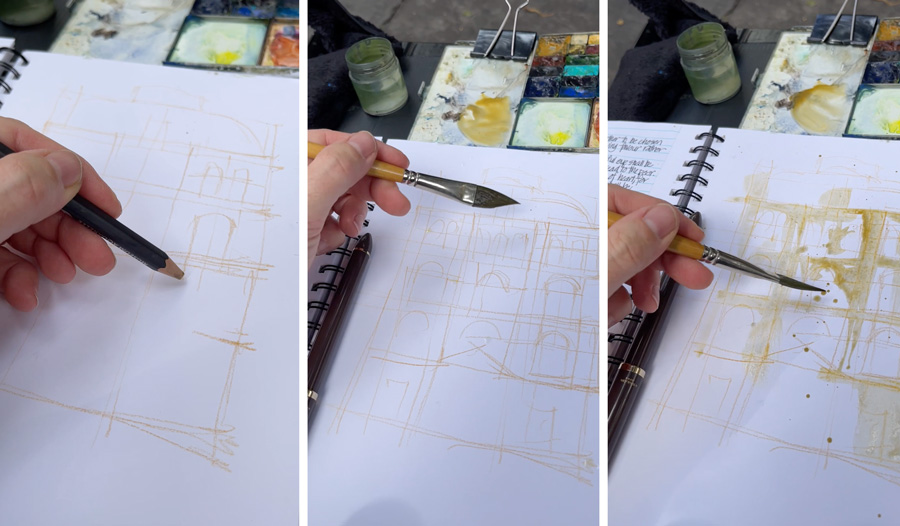
As this was a complicated facade I started drawing the structure with watercolour pencil (Caran d’Ache Museum Yellow Ochre).
As this was a ‘warm-up sketch’ (my first sketch for the day) I didn’t do any measuring and so these guidelines were just to give me an idea of the main structure and make sure that I could fit everything on the page.
I then applied the first wash very loosely (mostly Monte Amiata Natural Sienna) with a few splashes.
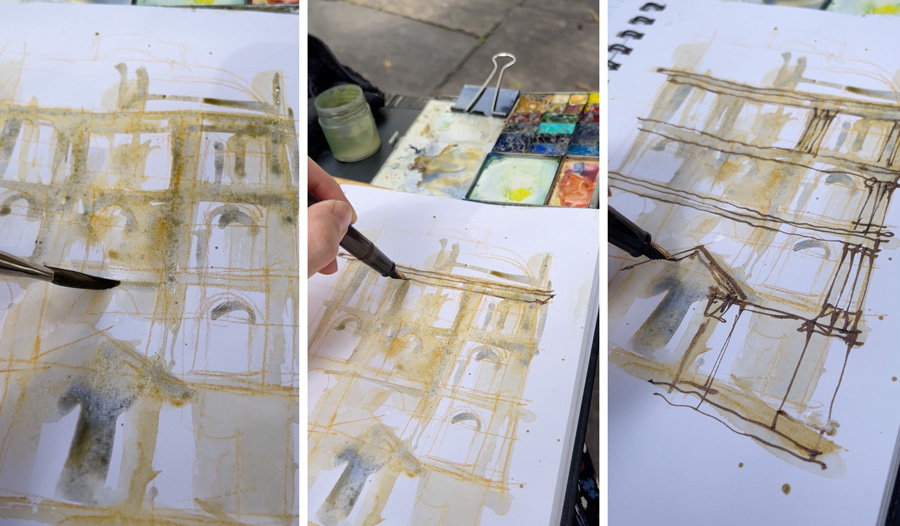
Next, I added a little shadow (using my pre-mix of Steel’s Grey) – letting this wash merge with the first one.
And then, before these washes were fully dry, I started drawing with ink. I’m using a Brown Sailor de Mannen pen with De Atramentis Sepia ink. Note: This pen comes with a 40 degree nib, but I’ve swapped it for a 55 degree.
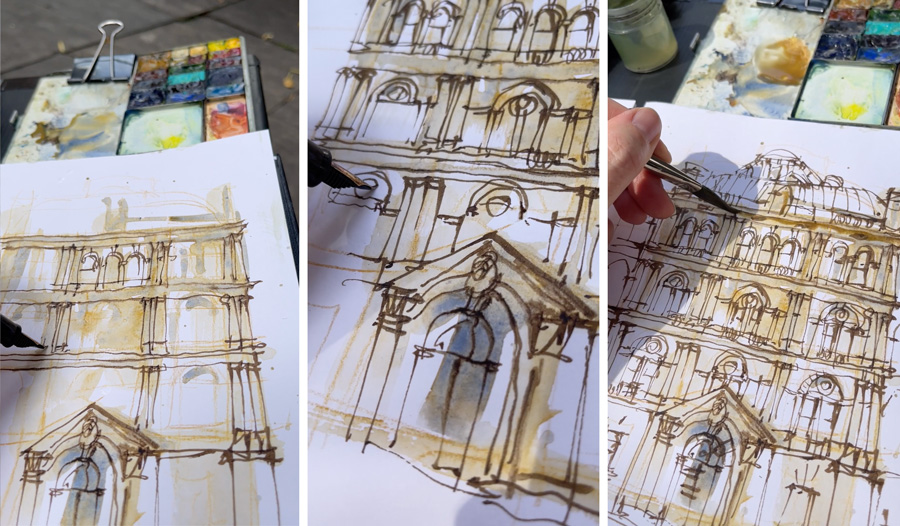
I’m following the ‘Structural Way of Working’ which I describe in detail inside my Buildings Course (drawing the structure first, before drawing the windows and the details) – but obviously, on this occasion I was doing it in a loose manner.
I wasn’t tracing the initial WCP lines but just using them as a rough guide – as I drew I was still very much focused on observing the building in front of me. This is a good example of what we are looking at this week in the Group Run-through of Foundations – Minimal Setup.
I then switched back to watercolour and added some more paint to the shadow areas.
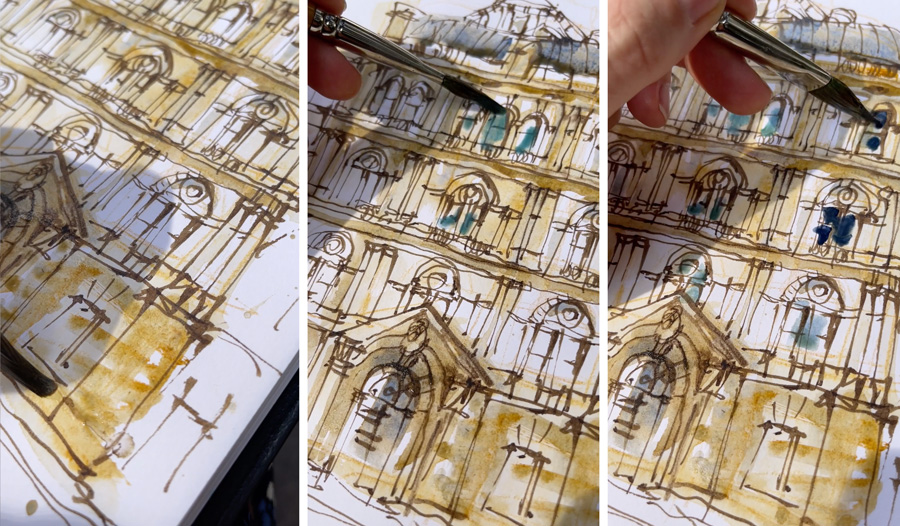
A little texture to the base of the building was next and then some turquoise (Cobalt Turquoise Light) and dark blue (Indanthrone Blue) to the windows.
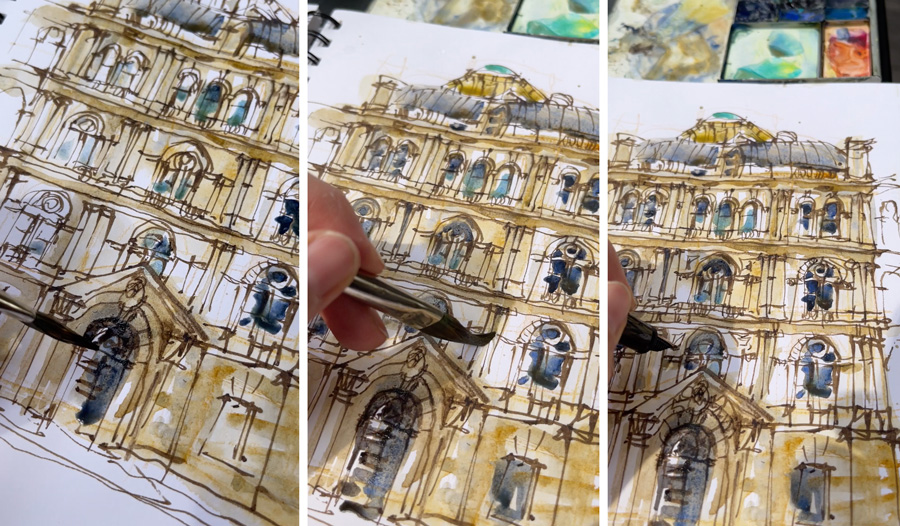
More darks, more shadows and then a few final details with the pen again.
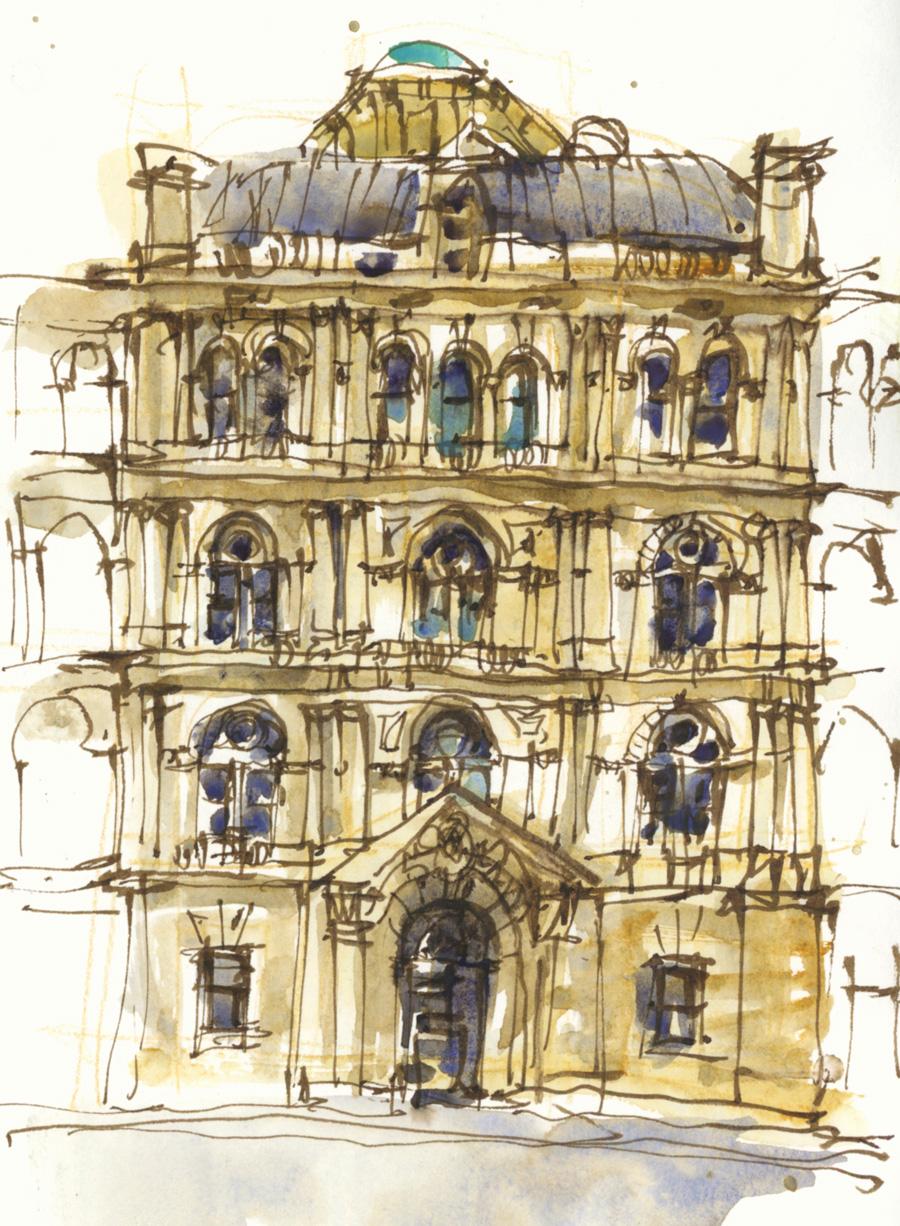
And here is the final version!
Every step of the way was very loose (even a little rough) but all throughout I’m trying to balance this looseness with a degree of precision so that the overall sketch is crisp and lively.
As mentioned at the beginning, this was my first sketch of the day – my ‘warm-up sketch’ – and I was certainly in the groove when I finished it!
More step-by-step articles can be found here.
Let me know in the comments section below if you have any questions.
(If you are reading this via email, please click on the article title link below and add a comment on my blog. Thanks!)





4 Comments
Thank you so much for this post, Liz! I wanted to give a try to this building, but couldn’t find a picture suitable. It’s sure a huge bldg! Enjoyed the step by step.
The step by step is fascinating! Such a gorgeous building, and doing it in a loose way really brings it to life!
Thanks Jamie!
I like following the development of your work. Your drawings of the forests now have much better depth of field! Additionally, the hues are so serene.
NEWSLETTER
Subscribe for first notification of workshop + online classes and more.